In the age of digital cameras and social media, everyone seems to be a photographer. But taking great photos isn’t as easy as it looks. Whether you’re shooting with your phone, mirrorless camera, film camera or a DSLR, here are seven tips & techniques to up your photography game. If you have just start photography as your hobby, and know the basic of the camera settings such as the shutter speed, aperture and ISO, then can advance to these basic photography techniques which is a must learn for beginners.
Here are some of the topics that will be covered in this blog posts.
- Learn the Basic Photography Techniques of Composition Rules
- Rule of Thirds / Framing Guideline
- Leaving Some Head Space
- Leading Lines
- Choosing the Right Backgrounds
- Depth of Field for Separation or Having All In Focus?
- Rule of Odds: Shooting in Odd Numbers
- Street Photography Tips To Consider When You Start In Photography
- Portrait Photography Tips
- Conclusion
Most people are used to shooting in automatic mode, where the camera makes all the decisions for you. But manual mode is where you really get to control everything about your photos. You can adjust the shutter speed, aperture, and ISO to achieve the perfect shot. You don’t have to use fully automatic mode, aperture priority mode is good enough if you want to take a quick snap, but for the most basic understanding, start with manual mode.
These photography skills, tips and techniques can be applied to street photography, landscape photography, cinematography and portrait photography. Once you have mastered these techniques which might take time, you will be on the fly.
1. Learn the Basic Photography Techniques of Composition Rules
When taking photos, it’s important to know the basics of photography composition. Composition is the process of arranging elements in a picture to create a pleasing image. There are many rules of composition that can be applied to different types of photos, and understanding them will help you take better pictures.
Another composition rule is the Rule of Focal Length. This rule states that you should shoot photos with a focal length that matches the depth of your photo. For example, if you’re taking a photo of a person, use a focal length that will give you a close-up shot.
One of the most common rules of composition is the rule of thirds. This guideline states that you should divide your photo into thirds horizontally and vertically, and focus on placing your subject in the middle of the frame. This will help to create a more balanced image, and will give your photo a more professional look.
Another common rule of composition is the golden ratio. This guideline states that you should divide your photo into two equal parts, and then use the golden ratio to arrange the elements in the picture. So, by dividing your photo into two parts and positioning the subject in the middle of one of those parts, you’ll achieve a more balanced image that follows the golden ratio.
2. Rule of Thirds / Framing Guideline

Rule Of Thirds is one of the most basic photography techniques & tips, and it’s simple but very effective. When shooting photos, always think about how your subject(s) will look in the final product. Divide your frame into thirds horizontally and vertically, and try to place your subject in the center. This will help you avoid having your subject dominate the photo and will give the photo a more balanced look.
The rule of thirds is used in filmmaking and photography and combined with composition to make good photos. Most modern cameras have a Rule of thirds guidelines that you can set in your camera. For example for Fujifilm users, the feature is known as Framing guideline and you can enable the guideline by accessing the menu. If you’re unsure where to set it, look through your camera’s manual.
You will be able to see horizontal and vertical lines on your camera’s LCD screen which indicate the rule of thirds. By using the guidelines, you can compose your photos and place your subject in the right position before you take the shot. It is beneficial for shooting street photography, landscapes, and portraits as well.
3. Leaving Some Head Space


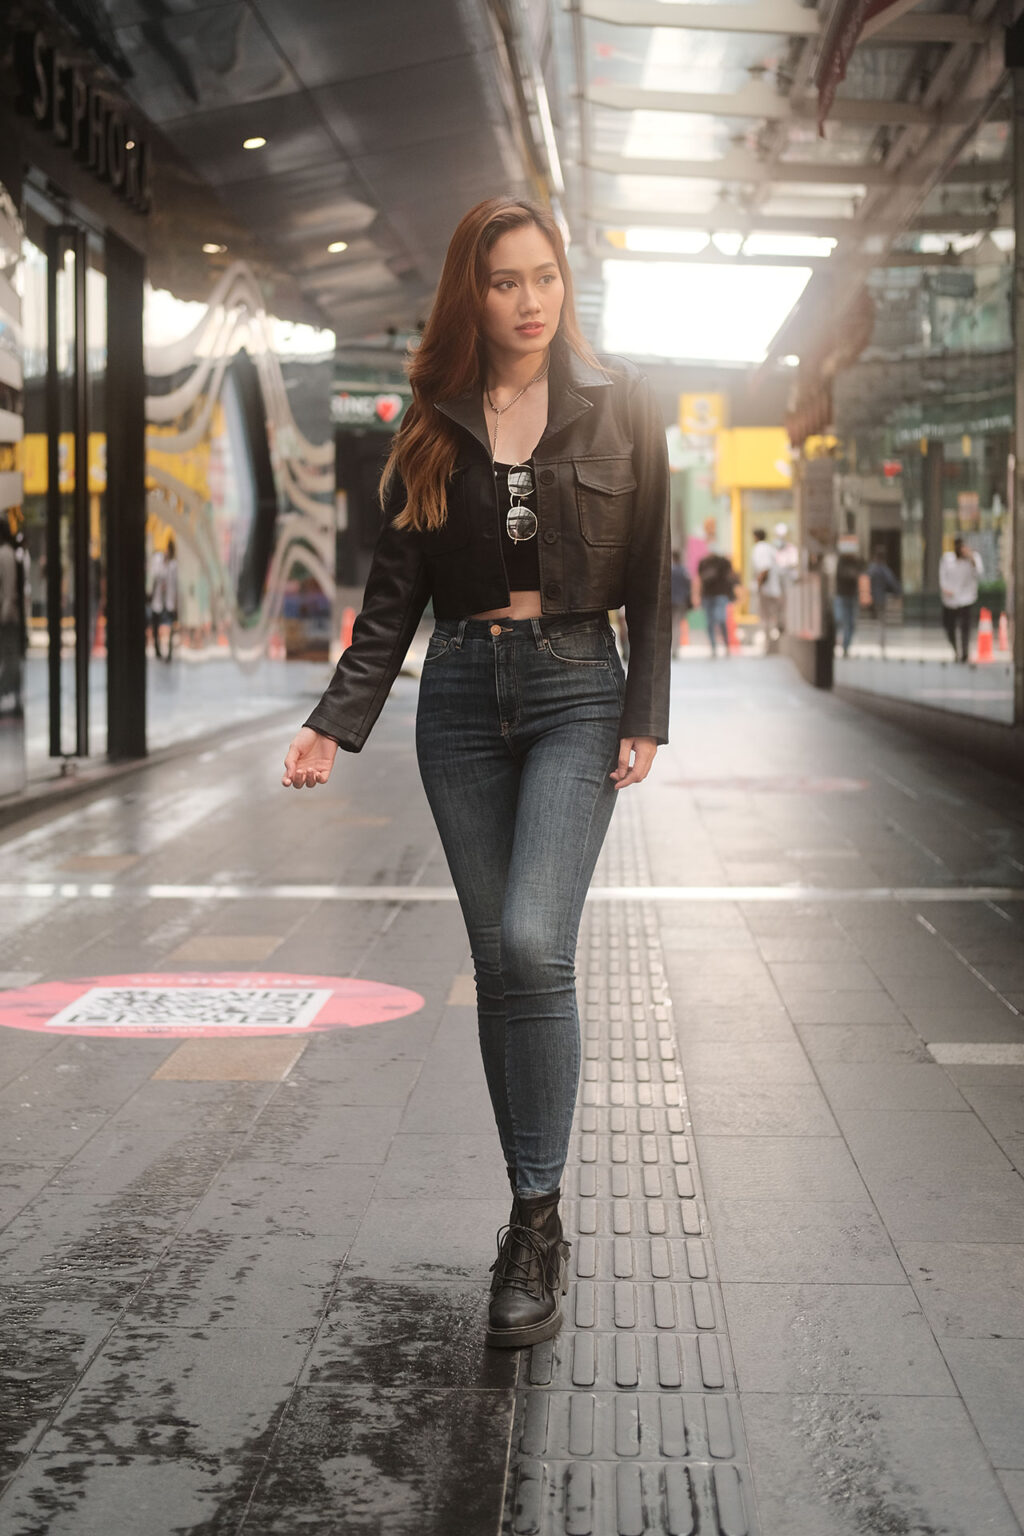
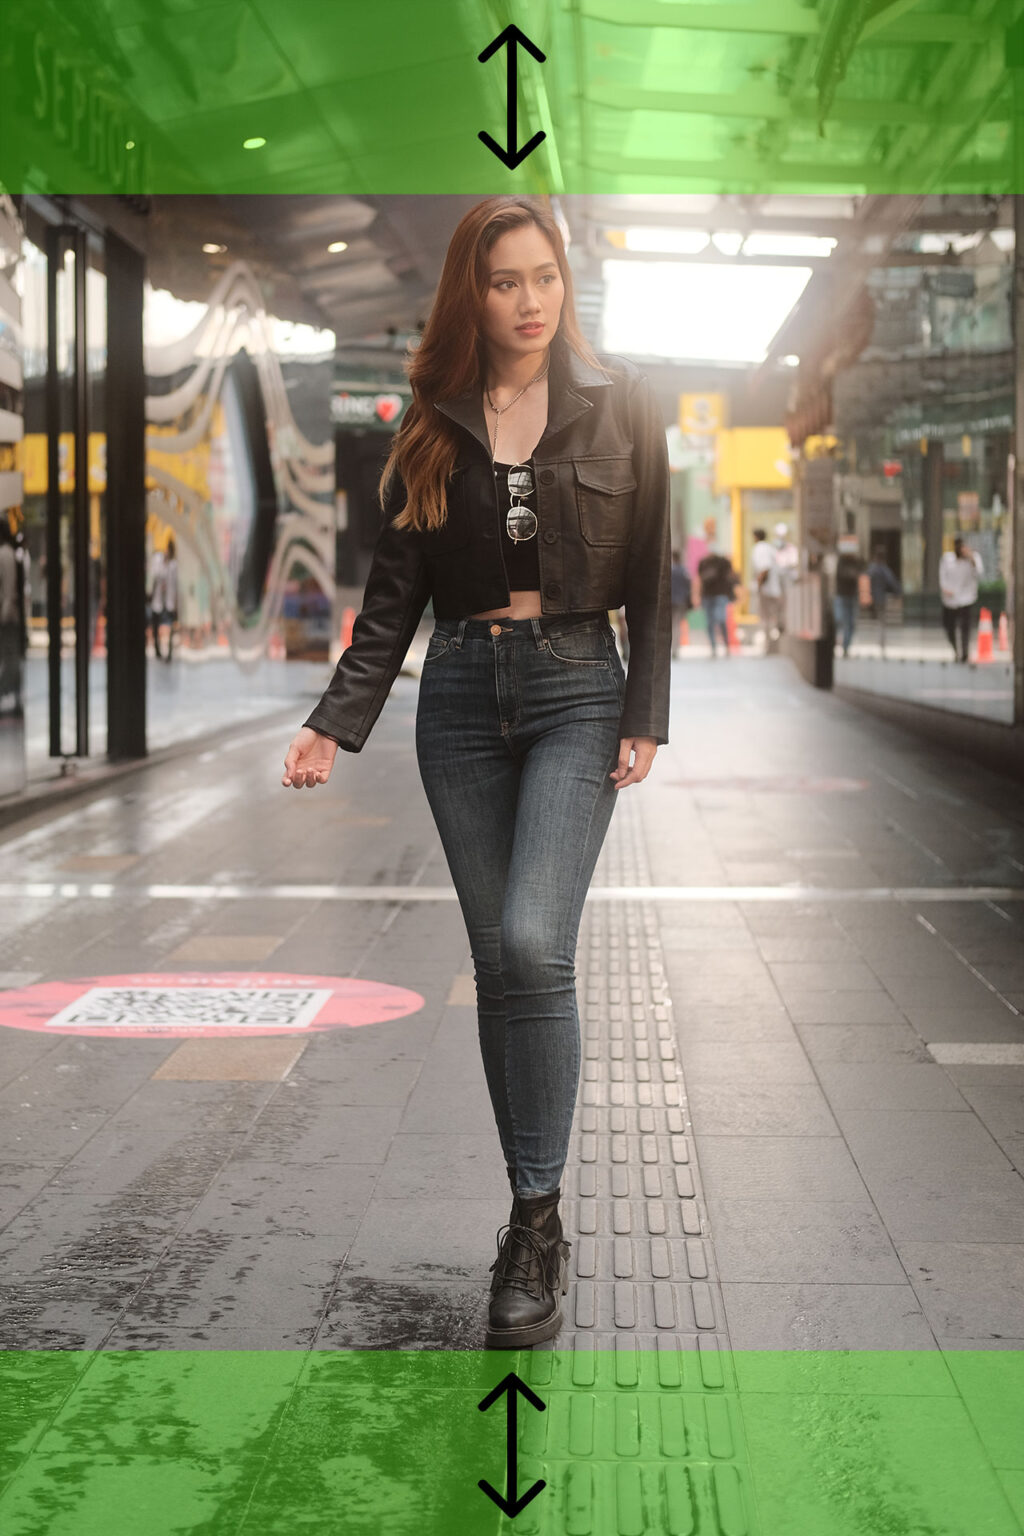
A common issue in photography is that objects and people can be cut off from the center of the frame, which can result in a feeling of emptiness or lack of focus in your photos. To prevent this from happening, always think about how your subject(s) will look when printed or displayed on a large surface. This is called headspace, and it’s a term used in architecture and design to describe the amount of space around an object or figure.
When you’re taking a photo, always make sure that your subject is within the headspace of the photo. Make sure that your subject is positioned so that it leave some space as much of the frame as possible. This will help to ensure that your photos look cohesive and focused, and will give your photo a more polished feel.
Always leave some space on the top and bottom when you’re shooting in portrait position. It’s the same with shooting in landscape size, leave some headspace on the top so it doesn’t look weird. This technique is combined with rule of thirds and composition.
Talking about space, you might want to avoid negative space when you are composing your shot, negative space creates an unbalance empty space in a scene which will not look good especially when shooting portraits. This is one of the basic photography techniques that will guide you to get image focused to create a story behind the photo or scene.
4. Leading Lines

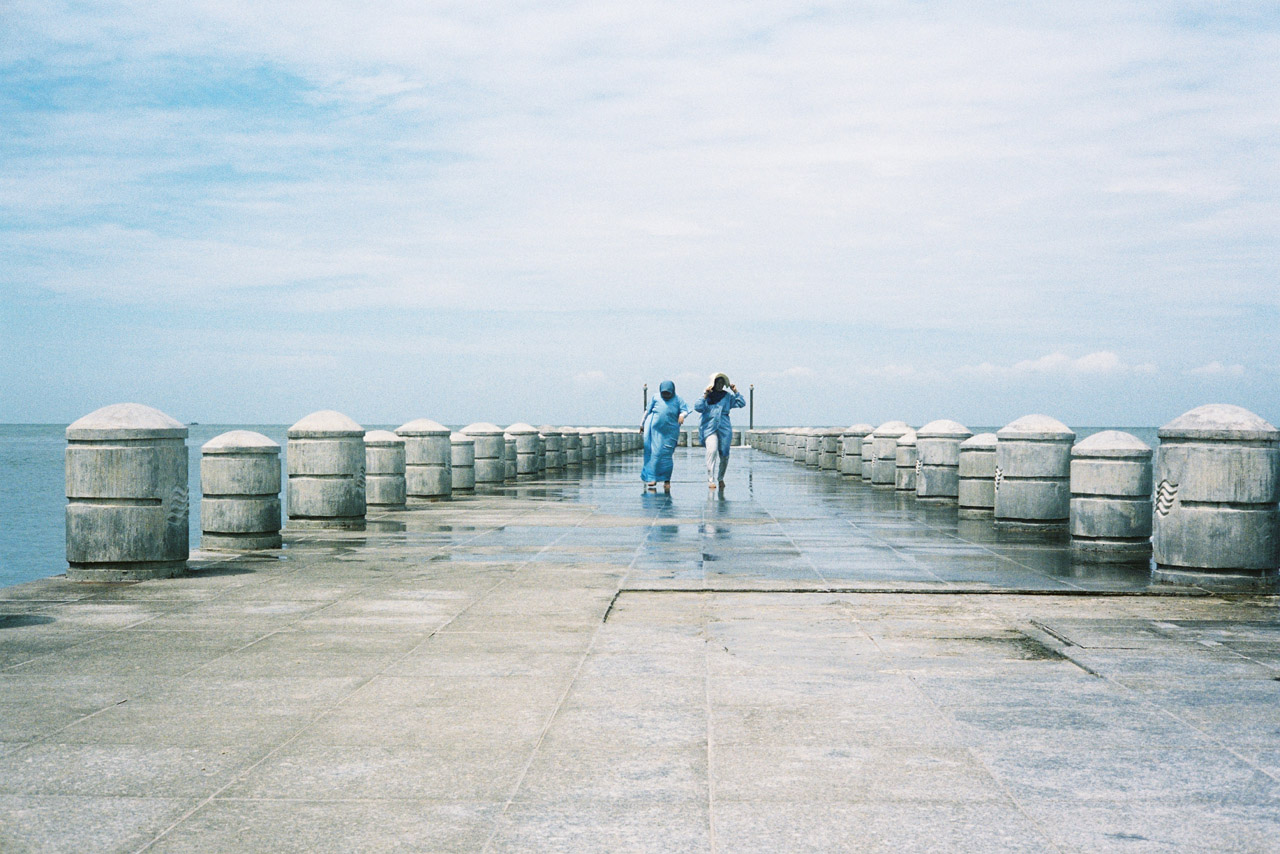
When composing your photos, always pay attention to leading lines. Leading lines are lines that run towards the center of the frame, and they can be used to create a more dynamic and focused photo. Leading lines can be created by using a background that has depth, or by placing your subject close to the edge of the frame.
Leading lines is the most essential and basic photography techniques that can be useful in shooting landscapes, street photography, and portraits. By using leading lines, you can create a more focused and dynamic image. Basically you can see leading lines used in films and photography. You will be able to see a lot landscape photographers using leading lines in their photos.
5. Choosing the Right Backgrounds

Backgrounds can be used to help create a more dynamic and focused photo. By using a background that has depth, or by placing your subject close to the edge of the frame, you can create a more focused and dynamic image.
One of the most common photography mistakes that beginners make is to use backgrounds that are too busy or too distracting. By using a simple background, you can help to create a more focused and dynamic photo.
Another common mistake is to use a background that is too close to the subject. If you are shooting portraits, avoid getting too close to the wall, as you want to get separation as much as possible.
6. Depth of Field for Separation or Having All In Focus?

Depth of field is a basic photography technique used to create a more focused and dynamic photo. By using a background that has depth, or by placing your subject close to the edge of the frame, you can create a more focused and dynamic image.
You can use the depth of field as your creativity, whether you want to make your subject in focused or vice versa. You can use autofocus or manual focus ring to get your subject within the focus distance. You can also try the aperture ring on your lens, for example, f1.4 which is shallow depth of field to f22 to have everything in focus. This method works well with zone focusing when your shooting street photography. Another way to create depth of field is by using a macro lens. This will help to get close up shots, and will result in a more focused photo.
For portraits, you can set the aperture to wide-open, standing within the focus distance where you get the subject in focus and completely blur out the backgrounds for separation and make your photos look more flattering.
One of the most important skills for taking great photos is being able to use a variety of focal points in your shots. By using different focal points, you can create interesting and unique photos that will be difficult to duplicate. Some of the best focal points to use in your photos are the sky, the ground, and the people in your shots.
7. Rule of Odds: Shooting in Odd Numbers

Odd numbers from 1,3,5,7 and so on is commonly used in street photography. When composing your photos, always pay attention to odd numbers. Odd numbers are a good way to break up a monotony, and they can be used to create a more dynamic and focused photo. Odd numbers is mostly used in filmmaking and photography which can be used in shooting landscapes, street photography, and portraits.
It might not be easy as it seems, but having odd numbers is possible of you are patience and trained the eyes to always pay attention to the surrounding. Sometimes it’s all about luck.
Probably after mastered all the other basic photography techniques, you can make this your last skill that you want to include in your photos and proceed to a more street photography composition elements to create more amazing street photos.
Street Photography Tips To Consider When You Start In Photography

When shooting street photography, the closer you are to your subject, the more interesting and dynamic the photo will be. You don’t have to be right up against them, but be within a few feet of them. If you’re photographing someone in a public place, it’s also important to keep in mind that they might not be happy if you’re taking their picture without permission. A wide-angle lens will give you a more expansive view of your scene, making it easier to capture everything in the frame.
By combining all of the techniques including composition, rule of thirds, odd numbers, you will be able to create something unique that can’t be create by other photographers. You can start using and explore it in your daily street photography ideas to get awesome results, once you have learned most of these basic photography techniques.
Portrait Photography Tips

The eyes in particular are an important facial feature, and they’re often the first thing people look at, especially when it comes to close-ups and headshots. Using the portrait composition will help you create a balanced and flattering images. When you’re taking your portrait, it’s important to find a focal point that will capture the eyes perfectly. There are a few different ways to achieve this, including using a wide-angle lens, placing the subject in front of a window or light to get the flattering catchlight, and using a tripod.
To make sure that the background is still visible in the photo, try to achieve a slightly blurred background and this can be done by using a wide aperture or change to your desired aperture. When you’re taking your portrait, it’s important to keep in mind the other elements of the photo, like the lighting and the clothing. By following these simple basic portrait tips, you will be able to create portraits that are both flattering and beautiful.
Use the rule of thirds as a guideline when you’re doing composition. Keep some space at the top and bottom of the photos so you never crop your portrait photos in a weird way.
Conclusion
Don’t be afraid to experiment with your photos. Try different angles or try shifting things around until they look right! It’s often surprising what works together naturally – sometimes adding props such as flowers or smoke adds drama! Shoot lots too, and you’ll start to see the kinds of photos you really can’t resist taking.
If you’re looking to up your photography game, these seven tips and techniques are a great place to start. From learning Rule of Thirds to compositions, these skills will help you take better photos no matter what you’re shooting.
This are the most essential photography skills that you need to know for every photographer.
- Aperture
- ISO
- Shutter speed
- Rule of Thirds
- Composition
- Depth of field


